I'm the family history expert for my family. Now that the next generation has taken an interest, they ask what have I discovered lately. Sending a chart of recent family finds can be difficult. (Everyone is using a different family tree storage option.) To make it easier for everyone, I've turned to PowerPoint 2010 and use the Smart Art Hierarchy option. It is easy to use and can be sent via email to those who request the information. Most of the kids have PowerPoint or an Open Source that accepts PowerPoint. They can take the information they want or add it to their files for later.
In PowerPoint 2010 Smart Art Hierarchy, there is an option for photos as well as text. If I have an image to go with the name, I can easily insert the image using the insert picture option embedded in the text box.
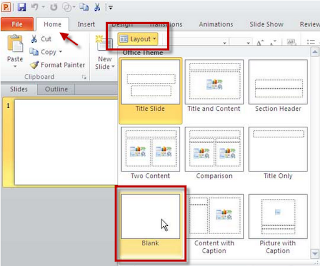
1. Open PowerPoint 2010 and select the Blank Slide option.
2. Now select the Smart Art option found on the Insert tab and select Hierarchy from the list and use the top, left hand style. Then click OK.
3. Once the Smart Art has appeared on your blank slide two new toolbars, Design and Format, will appear. Select the Design toolbar and in the Layout group select Picture Organization.
NOTE: The text boxes will change to text boxes that can accept images.
4. To add text, click on the box you want to add information and type.
5. To add a picture, click on the picture icon and follow the prompts to add a photo or image to your text box: 1. Click on Image box. 2. Select image. 3. Click on Insert.
Now save your presentation as usual, and it is ready so show.


