Monday, December 30, 2013

Have you heard about MOOCs?

What is a MOOC?
MOOC-The first time I heard this acronym, well, it sounded a little like a new flavor of coffee.   But alas, it is not a glitzy word for a beverage.  Instead, MOOC stands for Massive Open Online Courses.  Yep, its a learning option found on the Internet. Most MOOCs are free, non-credit courses on a variety of subjects that include Computer Science, Physics, Health Care, Political Philosophy and much, much more.  Course instructions vary from 3-10 weeks with approximately 2-3 hours of dedicated time each week.  Some of the courses are lectured based with short quizzes while other can be interactive online classes for a greater hands on experience.  If you have a crazy schedule like mine, you will appreciate the flexibility of taking a class at your own pace in the comfort of your own home or with a group of people who share the same interests.

Who teaches MOOC courses?
MOOCs have been around for quite awhile.  I took my first online class back about 10 years ago from the University of Toronto.  Today, many colleges and universities have joined together to provide quality education using an online portal to reach its students.  Think about it.  Wouldn't it be great to take a free class from a professor at Berkeley or Boston University?  Or perhaps take the course Entrepreneurship 101: Who is your customer from the Massachusetts Institute of Technology?  In early 2014 Harvard University is providing courses on the United States Health Policy, Introduction to Computer Science, and Early Christianity: The Letters of Paul.    Looking for a project type class?  You can find real-world, project oriented courses taught by leaders like Google, AT&T, and Intuit.

Who can take a MOOC course?
Anyone can take a course.  For the lifetime learner or a student, it can be a way to expand their knowledge of a particular subject of their choice. Perhaps you would like to refresh your knowledge on a subject you always enjoyed.  On January 15, 2014 I will begin the course Poetry in America: Whitman taught by Elisa New via Harvard. 

What do you need in order to take a MOOC course?
You need a computer with an Internet connection, active email address, and a comfy seat.  You will need to create a user account and agree to terms of services as well as terms of honor.  And as mentioned above, you can take a class at home, in an Internet cafe, or at your local library.  Many groups are taking advantage of library meeting rooms equipment with computers and projectors for viewing each class on a large screen.  Check your local library to see if a room such as this exists and then gather a group of fellow students for a group type gathering. 


Where can you find a MOOC? 

To find a MOOC, generate a keyword search in any browser using the acronym Mooc.  Some courses are for pay or fee based.  However, there are many free sites available to select a course right for you.  The May 10, 2013 issue of Library Journal featured three of the leading providers including: Coursera, EdX, and Udacity.  The course I'm taking can be found on EDX. 
If you have any questions about a MOOC site or assistance with getting started, please give us a call @ 330.458.3150 or email trainer@starklibrary.org
Happy Learning!
Dee

Friday, December 20, 2013

Android Devices and Library Digital Content


Are you looking to purchase or upgrade to a new Android tablet, Smartphone or other device?  Do you want to have access to all of The Stark County District Library's Digital content? If so, here are a few good things to know: 

Zinio requires a 4.0 and above Operating System
In order to access and view the SCDL's digital magazine collection using the Zinio app,  you will need to have a device that has a 4.0 and above Operating System. 

Hoopla requires a 4.0 and above Operating System
In order to access and view digital audiobooks, music, and movies using the Hoopla app, you will need to have a device that has a 4.0 and above Operating System.

Ohio Digital Library requires a 2.0 and above Operating System
The library’s digital collection of books, audiobooks, music, and movies available through The Ohio Digital Library are accessible on devices with 2.0 and above Operating  Systems. 
 
If you’re shopping for a phone and not quite sure what an Operating System is or the Operating System version of a device, there are a couple ways to find out. 

1.       If you’re browsing the web, click on the phone link and scroll through the description.  It will typically list the Operating System (OS).

2.       If you’re in a store, ask the sales associate.  Also check the packaging and see if you can find it listed in the description. 

3.       As much as we would love to know about favoriate mobile devices, there are many devices out there.  So take a few minutes and double check packaging and descriptions to make sure you’re getting what you need and want.

Monday, November 11, 2013

Library on the big screen: A guide to watching digital content on your TV

One of the great things about the SCDL’s newly expanded digital collection is the ability to read, watch, or listen to content practically anywhere with your phone or tablet.  But what if you want to enjoy movies and TV shows from Hoopla in the comfort of your living room on your widescreen TV? If you’ve got a laptop, a VGA cable, and a TV with a VGA port, you’re in luck.

Do I have a VGA port?
A VGA port on a laptop, with
a VGA cable.
 
Newer TVs typically include a VGA port in addition to HDMI and composite/”RCA” ports. Also referred to as a “D-sub” or even simply “PC” port, VGA connectors are a widely used way to connect computers to displays. Although they’ve been largely replaced by DVI and HDMI connectors on newer computers, manufacturers have a habit of including them on newer TVs.

To check if your TV has a VGA port, simply look on the back panel for a blue port with 15 holes (see picture). Next, check your laptop for the same port—it will typically be located on the back or side.
Finding the right cable
If both your TV and your laptop have VGA ports, the only thing stopping you from watching free movies and shows from the comfort of your couch is a VGA cable. You can pick one up on the cheap from Amazon or just run to Wal-Mart or Best Buy if you don’t mind paying a few extra bucks. But first, make sure you don’t already have one—if you have an old computer or monitor sitting around, there’s a good chance it used a VGA cable.


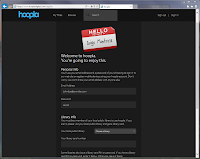
Signing up for Hoopla is easy--just visit hoopladigital.com and provide
your library card.
Putting it all together

Once you’ve got your cable, all that’s left to do is connect your PC to your TV. On the TV, press your source or input button until you find the one that says “VGA” or “PC.” You might need to press a button on your laptop to use the external display—this is typically one of the function keys at the top of the keyboard.
From here, you can simply navigate to Hoopla and sign in. If you haven’t already signed up for an account, you can do so by simply providing an email address and your library card. Select from any number of a growing collection of movies and TV shows, or play the latest albums using your home audio system.
While you’re at it, you can also enjoy any other online service like YouTube, Netflix, or Hulu on your TV using the same method.

The Hoopla app is freely available on both the
Google Play Store and the iOS App Store.
Other options
Although we haven’t been able to test this, you can also look into using your iOS/Android phone or tablet to send content from the Hoopla app to your TV. In order to do this, you’d currently need an Apple TV (for iPhones & iPads) or a Chromecast (for Android devices). If you already have one sitting by your TV, it’s worth a shot.

For more information, check out this article from the Salt Lake Tribune. For an overview of the SCDL’s digital collection, as well as some resources to help you get up and running, check out our website.

-Jesse

Monday, October 21, 2013

Updating to Windows 8.1: Part 2: What's Different


Hopefully if you’ve installed the Windows 8.1 update, all went well.  But even if everything went smoothly, you might be wondering what’s going on, because some things are certainly different.  I took screen captures of what I could, both before and after when I knew the change was happening, but there was even more new than I bargained for.  Here's just a little bit of what I've found.
 
What’s Different

 
Natural scrolling is gone.  For as long as I’ve used a mouse or a touchpad on a PC, moving down the touchpad or scrolling the wheel on a mouse towards myself, moved the screen down.  Moving up on the touchpad or mouse, moved the screen up.  But with Windows 8, Microsoft changed to natural scrolling, which Macs have used for a long time.  Natural scrolling is an attempt to replicate the hand movements of a touch screen on the touchpad.  Or, in other words, everything was backward from how it had been before.  With this upgrade, at least on my Lenovo RT, natural scrolling is gone.  For those of us who switch back and forth between Windows 7 and Windows 8 PCs, I’ve got to say I’m glad I’m going to be scrolling in the same direction all day.

UPDATE:  After another update, natural scroll seems to be back.  Lot's of people have discussed ways around there, including here.

 
File Explorer looks different.  In my opinion, Windows 7 got Explorer just right with all of the folders listed down the left side whenever you clicked the shortcut on the taskbar.  Windows 8 had continued this, but in 8.1, the folders are now buried a level.  In other words, instead of having Documents, Music, Pictures, and Videos available to be opened as soon as I enter File Explorer along the left side, I have to select This PC to get those links.  It doesn’t seem like a big deal, but that’s what I thought when I first saw all the folders available along the left side until I started using it and fell in love.
 
File Explorer in 8.1
The change that most people have been waiting for is the return of the Start Button.  Now, perhaps I didn’t understand what was going to happen with the Start Button, but I have to admit to being underwhelmed.  When in the Desktop environment, I thought the Start Button would function like the old one—clicking it would reveal a list of programs and other functions, such as the Control Panel.  But this is a Start Button, and it just takes you back to the Start Screen.
Windows 8, with no Start Button in the bottom left.
8.1, now with a Start Button in the bottom left.
The Start Screen is one place 8.1 has made a nice improvement.  Instead of just two sizes for tiles, now there are three or four size options.  (Why the fourth option—large—is not available for every tile is beyond me.)  In addition to having more size options, groups of tiles can be customized with titles.

More options on the Start Screen.
But my very favorite improvement is without question split screen.  In Windows 8 you could have two apps open and showing at the same time, with one app taking up about a quarter of either the left or right side of the screen and the other app filing the rest.  And it could only be two.  Now with 8.1 you can split the screen between multiple apps and drag at the edge to make each whatever size you want.  Of course, the Desktop still counts as an app all on its own, so splitting the screen between two Word documents, for instance, still can’t be done since two instances of the same app can’t be split.
 
My Windows 8.1 RT computer now does a real split screen.  Hooray!
And there are many other odds and ends.  The Store got a facelift.  The PC Settings page is much more user friendly.  Search from the Start screen now searches the web in addition to apps and your files.  And you can set up your computer to bypass the Start Screen and launch directly to the Desktop.
 
One last thing, because I think finding the solution to this took as long as the install.  My PC was reset to require a password when it’s turned on, restarted, or coming out of sleep.  I’ve never required a password log on for this computer, and I didn’t particularly want to start.  Thanks to this Nick’s Computer Fix video, I was able to get rid of the password requirement. 
 
Some other helpful tips, such as booting to the Desktop and adding a Start Button with a menu can be found here.
 
And that’s just a taste of Windows 8.1.  Good luck!
Shelia


Updating to Windows 8.1: Part One: Download and Install


Windows 8.1 is here!  It will solve all your problems!  Or so many people may think.  There are, indeed, a lot of improvements, but don’t go into an upgrade to Windows 8.1 thinking it will suddenly be just like Windows used to be or that everything will be perfect.  Also, I just discovered that I’m lucky I updated when I did, because Microsoft has temporarily pulled the update for Windows RT.

One thing you can be sure of if you’re about to upgrade: give yourself plenty of time to do it.  I have a Lenovo Yoga, which doesn’t have the world’s most powerful processor by any means, and it runs Windows RT.  The file size for the RT upgrade is 2.11 GB, versus the 3.5 GB file for Windows 8.1 Pro.  I spent an hour and fifteen minutes updating.  But on a rather ancient Gateway I own that I switched over to Windows 8 Pro, it took nearly four hours to finish the upgrade to 8.1.  I would guess most people’s experience will be somewhere in between those two, but I wouldn’t make plans when you’re about to run the update. To give you some idea of the size of these files, Apple says most standard definition movies in the iTunes Store of approximately two hours are 1.5 GB and a high definition version of the same film would be 4 GB.

The Download and Install

I had heard the update would be waiting for me in the Store, but when I clicked on the Store App from the Start page, I couldn’t find the download.  I decided to try restarting my computer, and that was when I saw that I had an update.  However, that wasn’t the Windows 8.1 update—it was a Firmware update I had to install before 8.1 became available.  After the Firmware update and the restart, the 8.1 update was waiting in the Store as I had initially expected.
 
You really can’t miss the update in the store.
Once you’ve clicked on the update, settle in.  In fact, I made dinner.  There was nothing to do but watch the wheel turn as parts of the file downloaded and installed with the computer restarting all on its own several times.  It wasn’t until I was asked to agree to the License and sign in with my Microsoft account that I needed to do anything.  A Microsoft account is either a Hotmail or Outlook email.  To set up a Windows 8 computer initially requires a Microsoft account, so everything should be ready when you get to that step since this is an upgrade.
An example of the sitting and waiting screen.
Sign in screen.
There were a few other simple prompts to follow, including verifying your account for security purposes with an email, but if you don’t have access to a second computer while running the update, you can select the option to take care of this step later.
 
In Part 2, I’ll detail some of the differences between Windows 8 and 8.1.
 
Shelia

Thursday, September 19, 2013

Apple iOS 7 and OverDrive Media Console


Apple released iOS on September 18th and many of your Apple users may have upgraded their device(s).

When an existing OverDrive Media Console (OMC) user upgrades to iOS 7, the app will fail when trying to open a DRM-protected eBook. New or first time users of OMC are unaffected by this issue.

We are resolving the issue but in the meantime, here are immediate remedies for users:

 1) Re-authenticate the app with their existing or a new Adobe ID. Refer to the iOS section of this Help article for assistance. (Recommended)  

2) Uninstall and re-install OMC which will also require the user to re-authorize with Adobe. IMPORTANT NOTE: A re-install will clear a user's bookshelf, history, and app settings.

Audiobook users won't notice that anything is different unless they attempt to download parts of audiobooks they already downloaded to OMC before upgrading to iOS 7. A user will receive an error message informing them to download the title again. 

Thank you,
Dee

Monday, September 9, 2013

How to Send a Text Message Using Email


If you ever find yourself in a situation where you do not have cell service but do have access to wifi, you can send a text message to someone’s phone using wifi and email.  To do this:

1.       Turn on your wifi and connect to a local spot ( hint…libraries often offer free wifi )

2.       Open your email

3.       In the TO or RECIPIENT area type the person’s 10 digit phone number followed by their phone carrier’s extension.

Examples:

##########@vtext.com (for a Verizon number)

##########@txt.att.net (for an AT&T number)

 *Special note:  Several carriers offer this service besides Verizon and AT&T.  I only listed those two because I have used both of them.  You will need to find the correct extension for the phone carrier of the person you want to message. A quick web search on the subject will usually get you a list of the extensions.

4.       Type and send your message as a regular email
The recipient will receive your message as a regular text, not an email.  If they reply though, the reply will go to your email.

I’ve had to use this trick twice now. Once while traveling in New England and spent the night at a place that was not within range of cell service, but did have wifi. Another time I did not have my phone with me, but did have a tablet that had wifi but no data plan. 
There is one major drawback.  You have to know the phone carrier of the person you want to text in order to attach the correct extension to their number. 

Tuesday, August 27, 2013

Credo Reference


Ever felt overwhelmed when trying to find reliable information on the Internet? A promo for Credo Reference says it best: “When researching on the Internet, no one can hear you scream.” If you use Credo Reference for your informational needs, there’s no reason to scream. Credo Reference is a free database that can be accessed from the Stark County District Library webpage. With one search, you are able to access hundreds of reference sources, all containing reliable information, along with images, sound files, animations, videos and much more! Better yet, it’s easy to use. 
You can begin your search with Credo’s basic search screen. Search all Credo subjects or choose to limit your search to one topic – art, history and science to name a few.


From the search results screen, you can limit your search by subject, type of entry, media type, person, publication date and more. It’s even possible to perform the same search using our library catalog.


Each Credo entry provides related entries and sources, and even includes the correct MLA or APA citation.
Sometimes it’s difficult to come up with just the right word for your search. With Credo Reference, that’s never a problem. Click “Concept Map” on Credo’s home screen and type in a search term to find related topics and ideas. Hovering over a term gives you additional information.


Credo Reference also has a handy quick-reference guide. From the homepage, click on “Gadgets” for instant access to a dictionary, crossword puzzle help, measurement conversions and more. Hopefully Credo Reference will soon become an indispensable part of your Internet searching, whether for a school project, research paper, or a quick way to find out how many ounces are in a pint!